Signal Testing
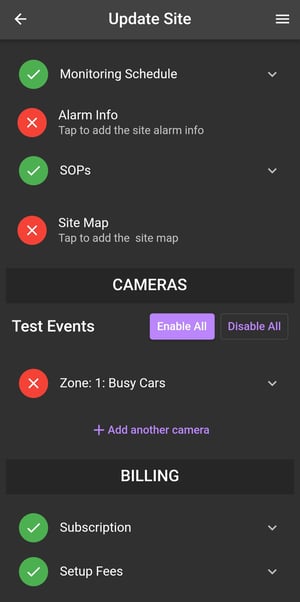
After you have added a camera, you can test the signals by going into the chosen Site and clicking Edit.
Scroll down to the Cameras section, and you will see the Test Events label beside "Enable all" and "Disable All".
You can use these buttons to turn all cameras on or off of test mode.

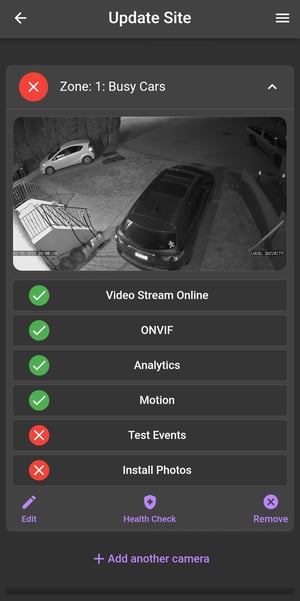
You can use the dropdown button beside your chosen camera to test a single camera.
You can use the dropdown button beside your chosen camera to test a single camera.
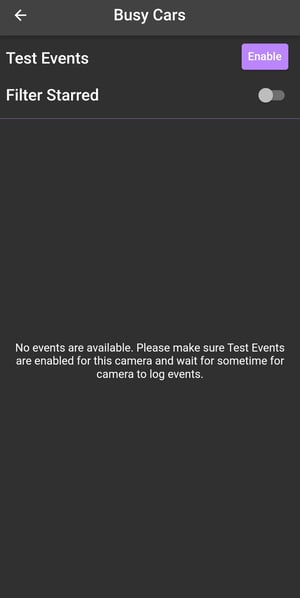
Clicking on Test Events in your specific camera will bring you to a new page where you can enable test mode.

Click yes when it asks you to confirm putting the camera in test mode.

Click yes when it asks you to confirm putting the camera in test mode.
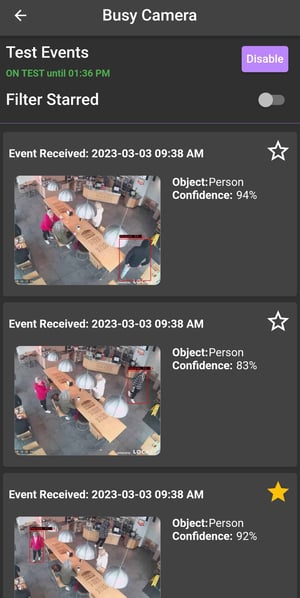
Once the camera is on test, you will get a popup letting you know the account is on test, and you will see an indicator telling you what time the camera will move off of test mode.
Any signals that come in during the test period will show up in the event log on the same page.
Once you have received your signals, you can choose which ones to include in your test report by Starring them. You can filter your Starred Images in your test result window.

When your signals have been received, the site will indicate this by changing from a red X to a green Checkmark.
Related Articles
Checklist for Submitting your Site to go Live
Use this guide to ensure your site has been submitted properly, includes all the information needed and is ready to go live! 1. Check on the green checkmarks. Confirm you have green checkmarks across all site fields in your Bounty Hunter app. 2. Take ...